
Apple has done some amazing work in recent years refining the definition of ‘small’ and ‘thin’ computers. The Macbook 2015, which I previously reviewed/compared to my Macbook Pro , is definitely the poster child for minimalist full-capability computing.
Unfortunately, I broke one of the keys on my Macbook when I accidentally dropped the laptop on our hardwood floor. My attempt to repair this demonstrated the dark side of all that miniaturization- the Macbook 2015 is very hard to fix.
The first recommendation I found was to replace the entire top of the Macbook: keyboard, touchpad, and case assembly. In addition to this being rather costly (several hundred dollars), it just didn’t seem right. The other keys were fine, and as far as I could tell the electronic ‘bubble’ key mechanism was still working. Just the hinge and the key were broken.
In the end, I was proven right- it is possible to fix a single key without replacing the entire keyboard. Here is my experience of that process.
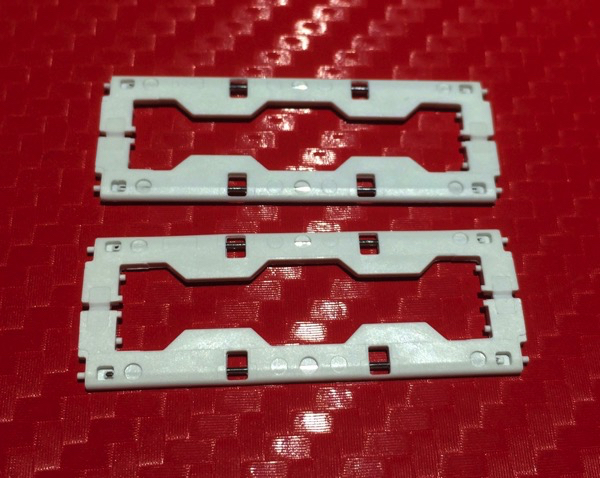
The Macbook keys individually consist of two pieces: the black ‘key surface’ that your fingers touch, and a white ‘butterfly’ hinge. The butterfly hinge is shown in the above photo, both broken and ‘intact’. The broken one is missing two tiny ‘nubs’ on the left hand side of the hinge. If your hinge has all eight of the nubs, then you may just need to re-install it.
If any of the nubs are missing, or the hinge or key (black part) are otherwise broken, you can try to get replacements through either of the following providers:
- Replacement Laptop keys (http://www.replacementlaptopkeys.com
- The Bookyard (http://www.thebookyard.com )
I got my keys via the Replacement Laptop Keys- they shipped via standard mail from the U.S., which was relatively inexpensive (albeit slow). The keys and mechanism on the 2015 Macbook Retina are apparently called the ‘Type L’ mechanism.
Removing the key
My first suggestion is to be very careful removing and replacing the keys on your Macbook 2015 i.e.: don’t play around with removing them unless you have to. The mechanisms are durable in normal use but very prone to breakage when removing / replacing.
- Use a thin, stiff ‘spatula’ shaped object to lift the key from the top edge
- I used a guitar pick
- The key may come up by itself (black part only) or, in my experience, it will come up with the (white) butterfly hinge attached
- Once the key is removed, confirm whether the butterfly hinge is attached or still connected to the keyboard mechanism
- if your goal is to replace the key entirely, you’ll need to remove the hinge as well
- if it is still attached, use your lifter to gently separate the white hinge from the clear ‘dome’ or bubble electrical mechanism
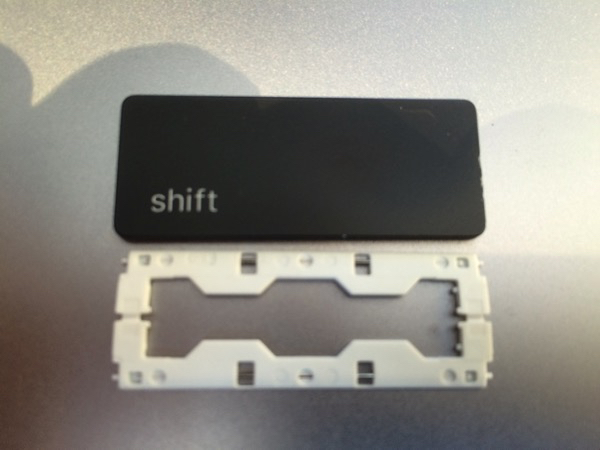
Now you have these two delightfully tiny parts:
Installing the key
This is where things went sideways for me. I broke the replacement key I got during my first installation attempt because I was trying (apparently) to install it upside down. But I think it is safe to say that there are a multitude of ways to break the key or hinge during installation, and apparently only one way to do it ‘correctly’.
- place the hinge first, being very careful to double-check it is facing the correct way
- the dimples should be down and towards the front (trackpad) side of the machine.
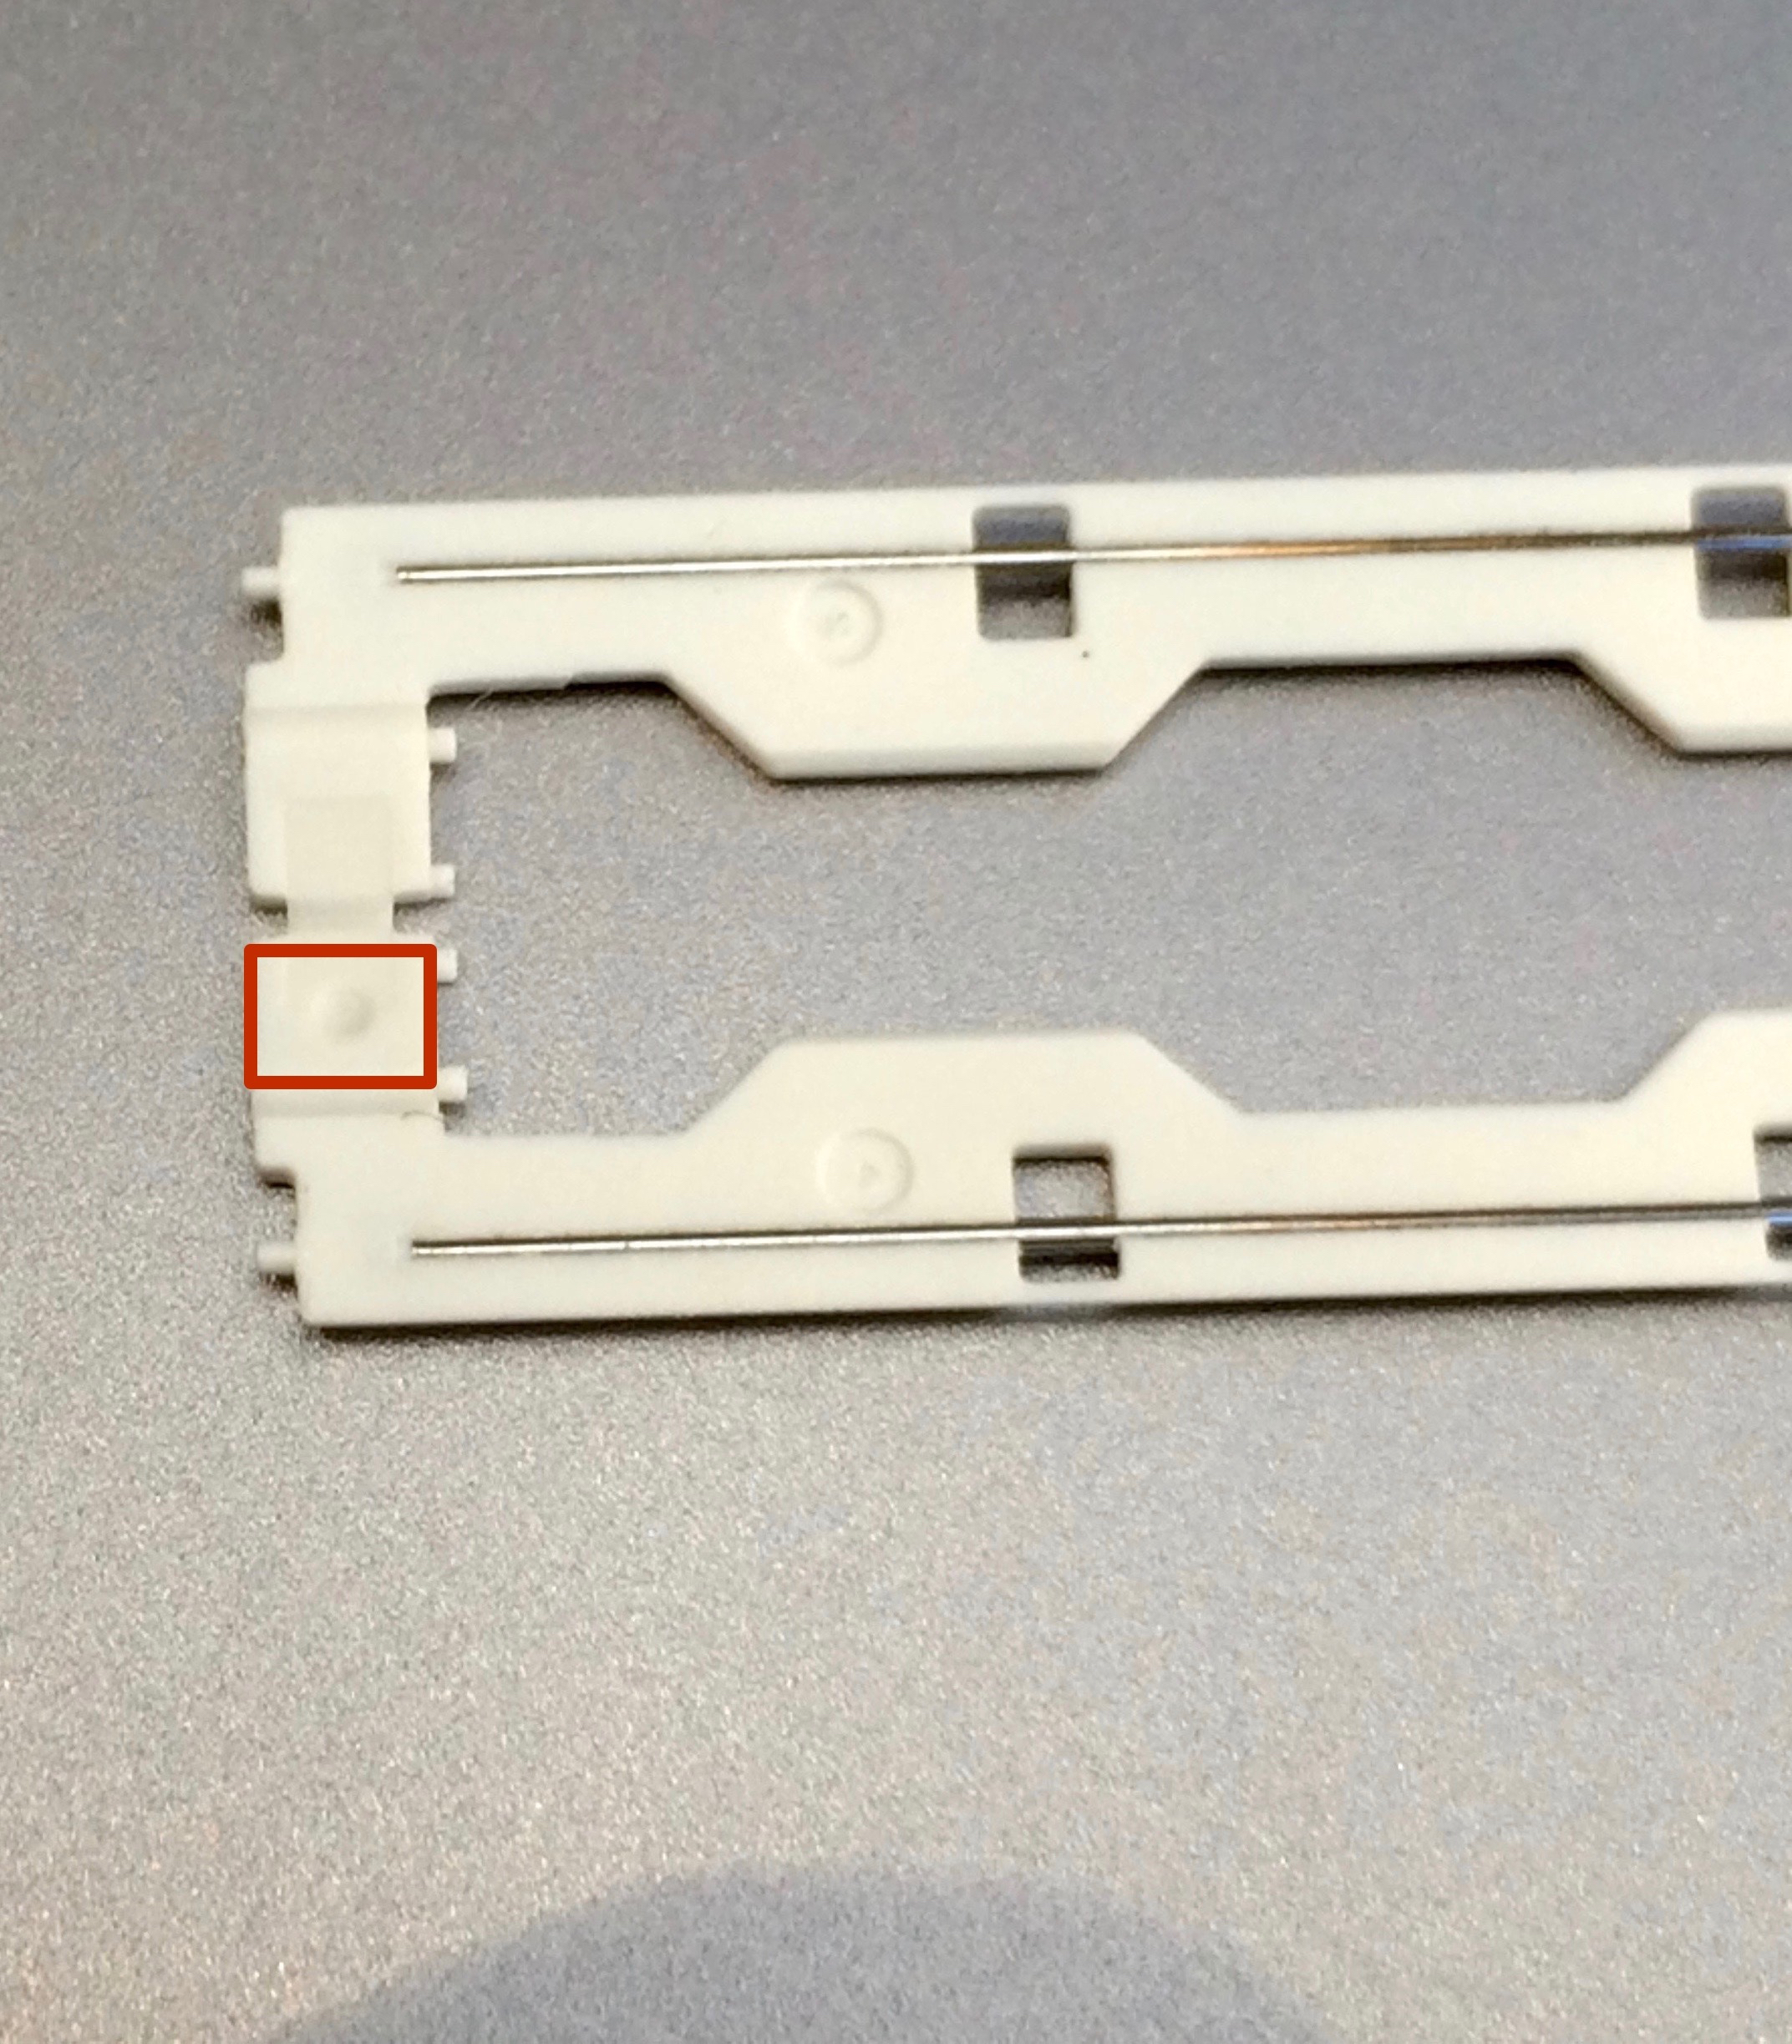
The red box identifies the ‘orientation dimple’
- gently press down on the hinge at each ‘nub’ to pop it into place; do not break these nubs or you’ll be back to square one
- once the hinge is placed, orient the black keycap over it; slide it towards the bottom of the Macbook until it ‘catches’
- if you look at the back of the keycap, you’ll notice that the ‘hooks’ on the bottom edge are different than the ‘clips’ on the top edge
- once the key is ‘caught’, gently press down on the top edge- it should snap into the hinge with minimal effort
Congratulations! You’ve either:
- a) successfully replaced your broken key with a working one
- i.e. the key depresses slightly and activates,
or
- b) successfully broken the replacement
- i.e. the key depress/bounce back still doesn’t work, and/or the key falls off when you turn your computer upside down.
In my case, I broke my replacement key and had to order another. I got it right the second time- total cost about $35 and a long time without a working shift key, versus probably $300 to replace the entire top of the laptop.
the butter fly hinge is attached to the key surface but not the keyboard I’m no sure in what step attaching the key to key board begins but my key doesn’t snap into place
Alana, what I did was separate the hinge from the black key cap after removing both from the keyboard. Then I replaced the hinge first, then the key cap fit onto the hinge.
I’m not sure if that helps, but if not try googling or perhaps youtube- there might be a video out there that will help more than my words 🙂