The second “learner” clock I worked on [1] was completed early in December and has been delivered to its new home. I am pretty happy with the results:
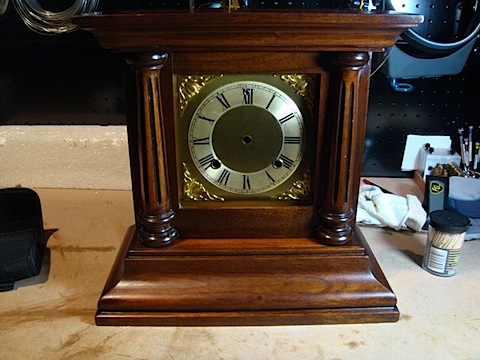
Case after restoration:
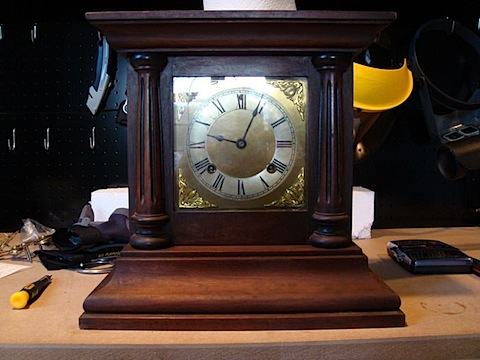
Case before restoration:
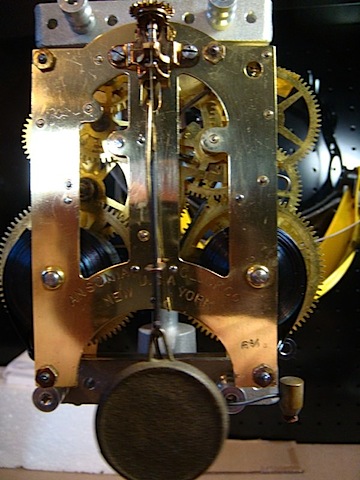
The “after” picture is before I re-installed the mechanism in the case (thus the hands aren’t visible)- since the case is what most people see/understand, that’s the picture most people will grasp. The mechanism is working well and is strong- my repairs mainly consisted of replacing a few bushings and cleaning thoroughly. It was “stopped” when I got it, gummed up by a gross buildup of oil and dried up WD40. For the “gear heads” out there, here’s what the mechanism looked like when complete:
The clock became a Christmas gift for my brother in law Bryan after he indicated an interest in mantle clocks. Word to the wise- if you are a relative or friend, and say “I’ve always wanted an antique mantle clock” or anything similar within my hearing, you might just get one some year. You’ve been warned 😉
Now I’m starting on my third clock. This one is an Ingraham “gingerbread” mantle clock circa the late 19th century- probably around 1890 or thereabouts, but I’ll have to get that confirmed with some help from the folks on the NAWCC forums [2]. Gingerbread in this context mainly describes the process for the case manufacturing: the patterns are embossed rather than carved, a sign of the “mass production” that became more common in the latter part of the 19th century. Once I have my skills built up, I really want to work on late 18th century and early 19th century clocks: but because those are rarer, I want to make sure I can do them proper justice before I lay my hands on one.
It is another time/strike mechanism, very similar in many respects to the Ansonia as are my next two planned “fixers”. This one is actually running at the moment, and shows clear signs of having been repaired/restored a decade or two ago:
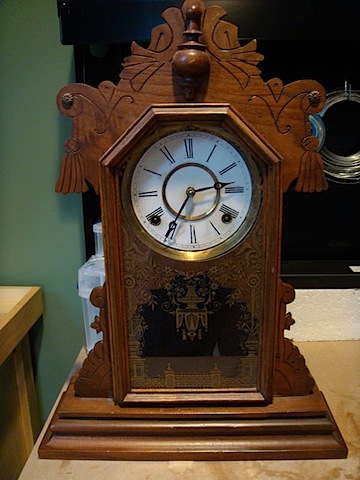

The paper face was replaced when it was repaired which, to some extent, is a bit sad: the shiny white face looks out of place on a 100 year old clock. The bushings are all in good shape from what I can tell- I suspect a complete cleaning plus some restorative work on the case (there is one break at the top, and the nails holding the base on are pulling out) is about all it will need.
The excess of standard “American time and strike” clocks in my first batch of learner clocks represents what is commonly available- but the lack of variety isn’t good for my intent to learn as much as I can from each clock. I’m on the look out for a weight driven Ogee style clock to add to my knowledge, but I haven’t found one yet since I’m fussy (I want an 8 day mechanism) and since they are comparatively rarer versus the spring driven mechanisms.
Side note #1: Fixer #1 (a spelter Gilbert gilt No. 115) [3] is still dead. I tore it down again and replaced two bushings as well as correcting some bends in the hairspring, put it back together and wound it up… which broke the repair I did to the mainspring barrel. The metal is very low quality, and the repair approach I used (cutting a new tang/hook) was questionable. So I’ve set it aside again, until I feel like trying the “craft a rivet” approach that is more recommended.
Side note #2: a picture of the most expensive clock repairing tool I own, an Elma / KWM bushing tool with a complete set of over 1,000 brass bushings.
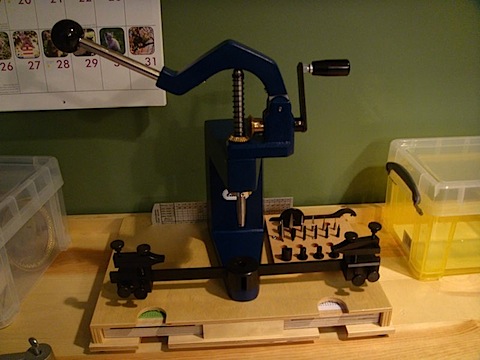
This is a lovely hand-driven tool, one of (if not the) best of its kind. Yes, I tried hand-cutting a couple of bushing holes before I got this- it sucked. And yes, I’m totally spoiled 😉